Horizontal plastic bottle for hydroponic culture
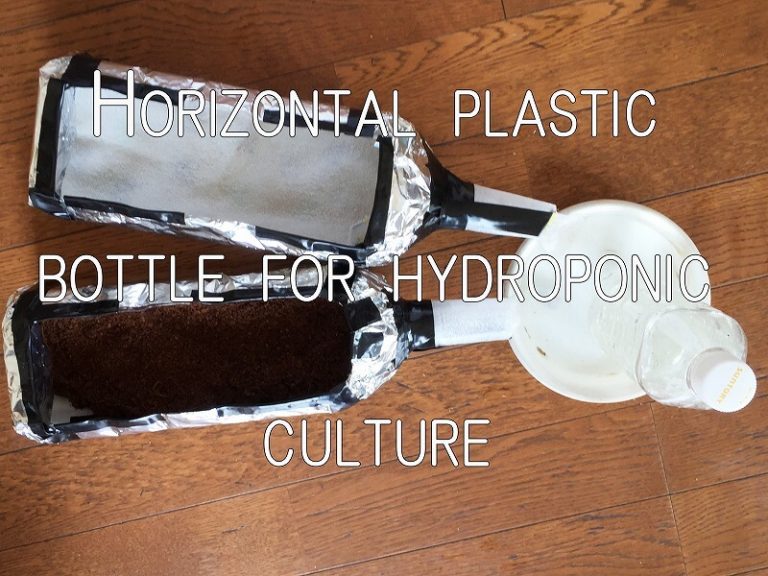
A horizontally oriented plastic bottle for hydroponic culture.
As we can use more widely than vertical plastic bottle, we thought whether it was suitable for vegetables
which root does not go into deeply too much.(*^▽^*)
What you prepared
★ plastic bottle (square type of durable material.)
★ Polyester fiber cloth (sold as a cloth in One Dollar shop etc.)
★ Packing sheet (Sold as packing material at One Dollar shop. Sheet for wrapping glass and pottery.)
★ Scissors, ★ Cutter, ★ Vinyl Tape, ★ Aluminum Wheel
★ Palm peat (fiber of palm fruit) ☆ A thing to make an air layer (hydro cone, permiculite, etc.)
(These two are also sold at the One Dollar shop, etc.)
Notes
★ The cloth used to absorb moisture should be made of chemical fiber.
(If you use cotton etc., it will melt over time.)
★ Hydrocone, permiculite, etc. that are laid on the bottom were used to create an air layer (to prevent root rot).
★ The packing sheet prevents drying and evaporation from the water intake.
Future Improvements
★ We control evaporation of water from saucer
★ Improvement of the air layer (such as forming a layer between the water of fertilizer and the palm peat for fixing, etc.)
Making a horizontal plastic bottle for hydroponic cultivation
Make plastic bottles for horizontal water culture. (`・ω・´)
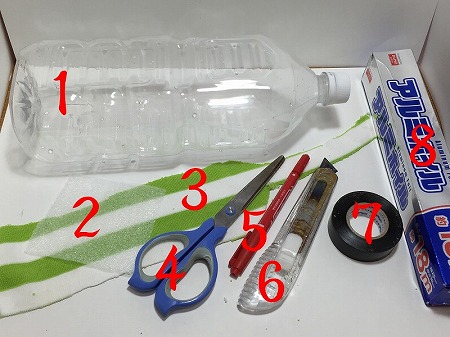
What you have prepared is
1. Plastic bottle (I chose a square type and made of durable material.)
2. Packing sheet (This prevents moisture from evaporating from the water inlet. It is sold as packing material in One Dollar shop etc.)
3. Polyester fiber cloth (sold as a cloth at One Dollar shop)
(If it is cotton, it will melt along with the passage of time, so it is better to use a chemical fiber cloth.) >> Experiment corner
4. Scissors
5 Oil-based.Pen (for mark. Color is optional)
6. Cutter
7. Vinyl tape (color is your choice)
8. Aluminum foil
We have prepared. (`・ω・´)
First of all,
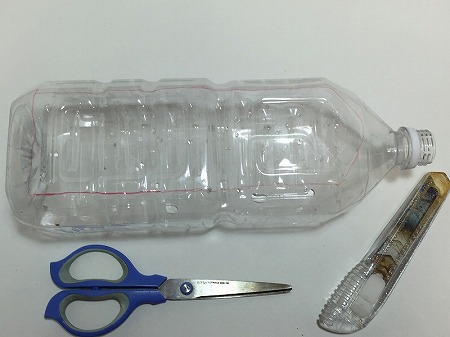
Use an oil pen to draw a line where you want to cut.
I thought it would be less durable if I cut everything on one side, so I draw a line around where I left and left 1.5 cm to 2.5 cm.
When you draw a line, cut it with a knife and put scissors in the vacant part. (^ ^)
(It is better to stop cutting with a cutter alone. It is dangerous and will not cut well.)
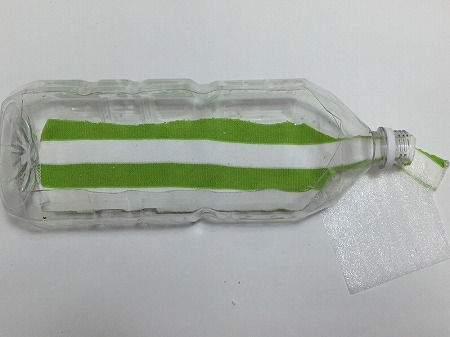
When finished, prepare a polyester fiber cloth and packing sheet.
The polyester fiber cloth was cut into the shape of the bottom of a plastic bottle, and cut so that the cloth was about 6 cm from the water intake.
The standard size of the packing sheet is about 7 x 7 (cm).
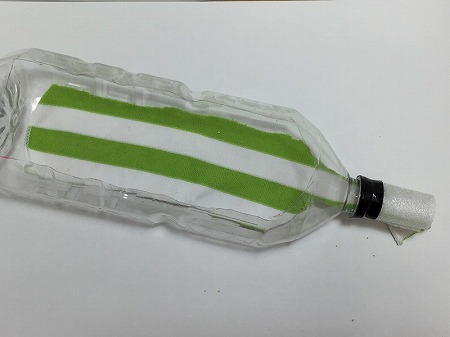
After pulling on the polyester fiber cloth, wrap the packing sheet with plastic tape around the suction port.
(A single round of the water inlet and the end is fastened with a brown tape.)
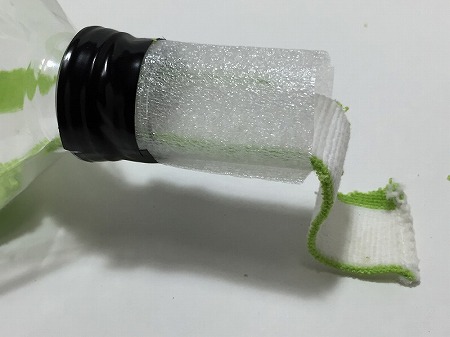
This is what you see when you zoom in. , (*^▽^*)
※ Please shorten the packing sheet if you think you're sucking too much water.
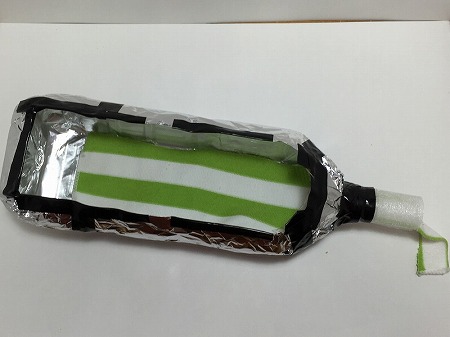
Next, cover the outside of the plastic bottle with aluminum foil.
(Aluminum blocks sunlight and prevents the loss of fertilizer due to the growth of moss.)
(As a way to paste aluminum foil, fold the remaining aluminum foil by wrapping the plastic bottle all the way
I feel like stopping with vinyl tape. )
Related posts:
No related posts.
