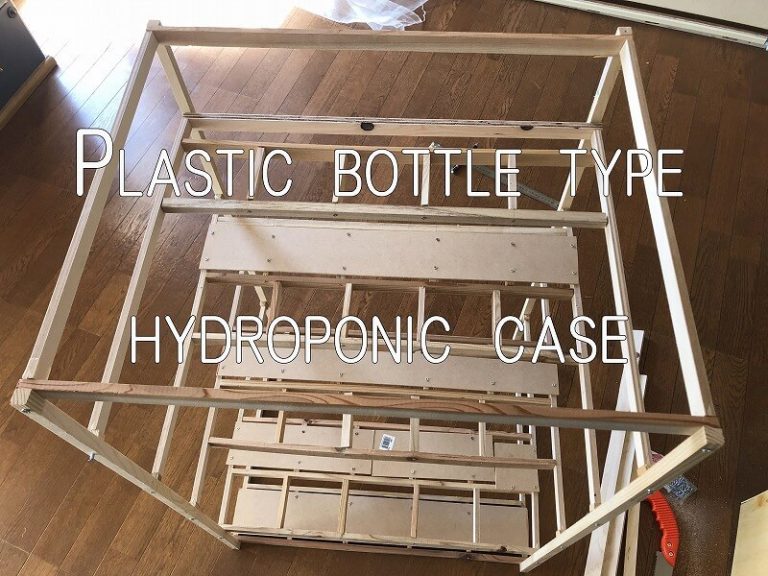
Plastic bottle type hydroponic case
If you are using a plastic bottle type hydroponic culture machine
If it is a day of strong wind, it sometimes falls,
As there are cases where starlings mischief,
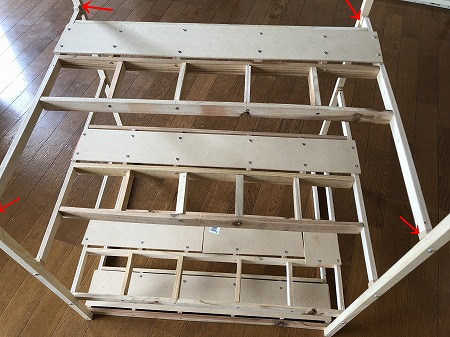
I made a box for putting together plastic bottle type hydroponic culture machines.
(※Japanese is translated into English by translation software. I am sorry if it is strange English.)
Production diary of plastic bottle type hydroponic case box
I wanted to make it as cheap as possible, so I went to search for various materials.
When I was looking for a home improvement in the neighborhood,
waste material left in a place where I could cut the material was being sold for sale.
Among them, plywood (which is made by bonding several sheets together)
was selling very cheaply because it seems that it can not be disposed of normally.
(in units of 10 yen or so) (*^▽^*) It would be cheaper if this!
I found some good ingredients, so I would like to make them immediately.
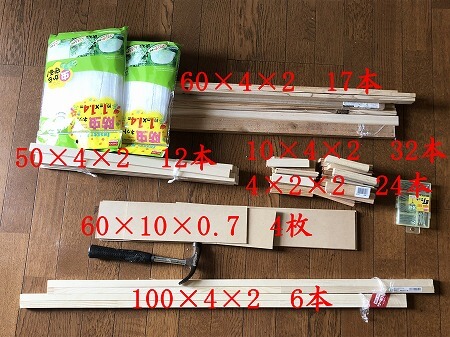
The first board you prepared
Six 100cm x 4cm x 2cm
Seventy 60cm x 4cm x 2cm
There are 12 50cm x 4cm x 2cm
32 x 10 cm x 4 cm x 2 cm
Four 60cm x 10cm x 0.7cm pieces
24 x 4 cm x 2 cm x 2 cm
Prepared.
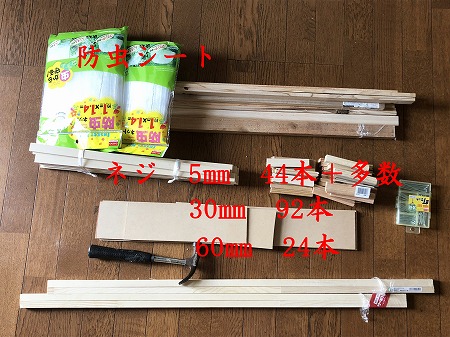
After, wood screw
5 5 mm + 44 (for fixing the repellent sheet at the end)
92 pieces of 30 mm
60mm is 24 pieces
Also, an electric drill for drilling a screw hole in wood (a drill a little smaller than a wood screw)
A driver, an insect repellent sheet, etc. (2 sheets of Daiso(One Dollar shop)) were prepared.
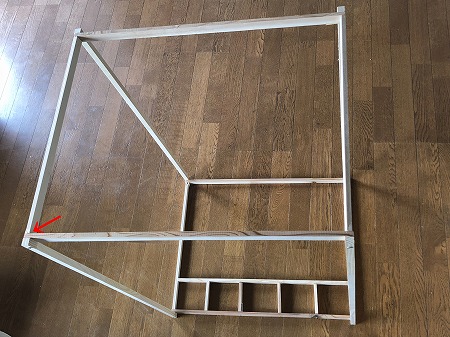
First, make the bottom foundation.
Make three 60x4x2, two 50x4x2, and four 10x4x2.
I assemble two 60 x 4 x 2 and four 10 x 4 x 2 with a 30 mm wood screw
in a shape like a ladder,
Because it is hard to turn and screw in the wood screw with a screwdriver and use
physical strength,
A small size motor drill that is slightly smaller than a wood screw After drilling a hole with a drill
, I took the way to close the wood screw with a screwdriver.
When parts like a ladder are assembled,
First, fix the two parts of the ladder part and 50 x 4 x 2 with a 30 mm wood screw.
(60 x 4 x 2 remains)
Then, prepare four 100x4x2, two 60x4x2, two 50x4x2,
After putting a 60x4x2 board like a red arrow,
stop with a wood screw 60mm.
I put a plate of 60 x 4 x 2 left on the base between 100 x 4 x 2 and screwed it with wood screws.
(I can not understand the explanation, (;'∀'))
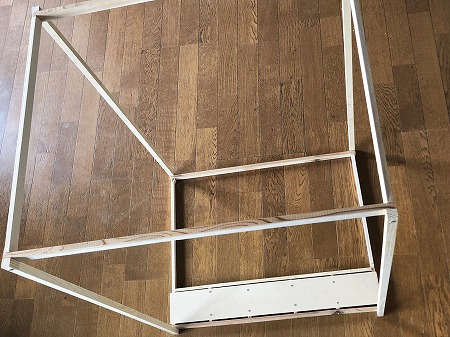
Finally, I put a 60 x 10 x 0.7 plate on the part of the ladder and fixed it with a 5mm wood screw.
The bottom base is complete. (*^▽^*)
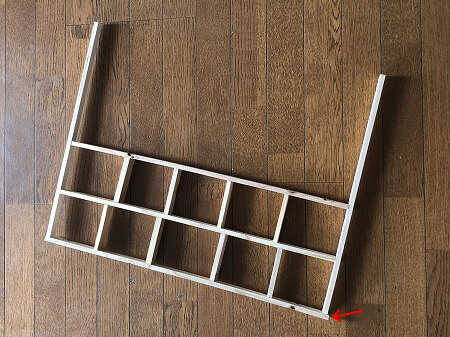
We will make the second row.
Make three 60x4x2, two 50x4x2, and eight 10x4x2.
First of all, the plastic bottle will be inserted into the part of the ladder and the part of the ladder in the foremost, so
60 x 4 x 2 plates to be as uniform as possible while
securing the space for the plastic bottle to enter. Fasten a 10 x 4 x 2 plate with a 30 mm wood screw.
I was careful here when using a 30 mm wood screw to fasten the 10x4x2 board of the second ladder part. Since the wood screw doesn't enter by turns, I shifted it a little and stopped.
Then the red arrow part, because it is locked with a 60mm wood screw in order to fix the second step to the outer frame,
30mm wood screw which has a part of the end of the part of the last part of the ladder is We put screw hole a little under and adjusted screw hole so that
two screw holes could pass.
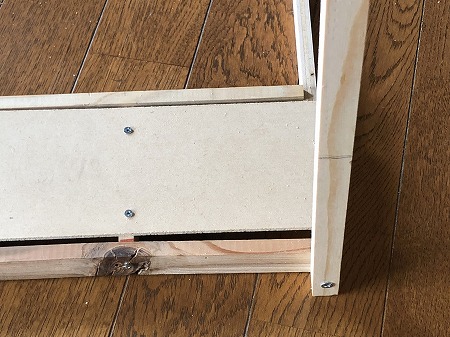
Before installing the second step,
once place the plastic bottle hydroponic culture container to check its height,
mark it there.
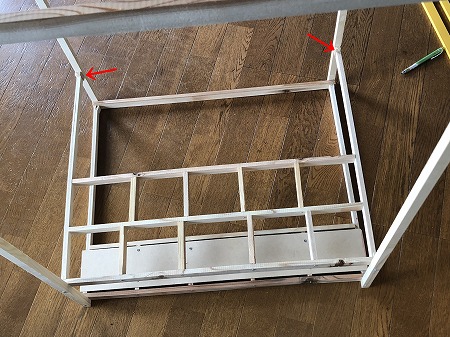
Next, prepare two 4x2x2 boards.
Attach with a 60 mm wood screw at the height of the mark that attached the second-tier ladder part earlier.
After installation, I inserted 4 x 2 x 2 wood at the location of the red arrow and then installed it with a 60 mm wood screw.
(Drilled with a drill first and then installed.)
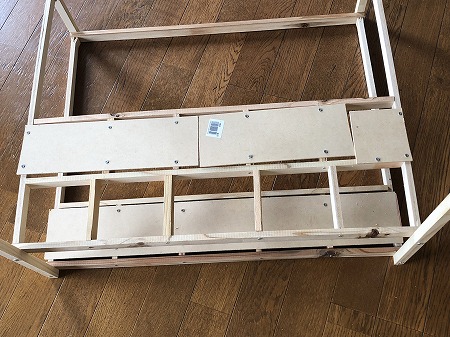
Attach a 60 x 10 x 0.7 plate on the second part of the ladder behind. (`・ω・´)
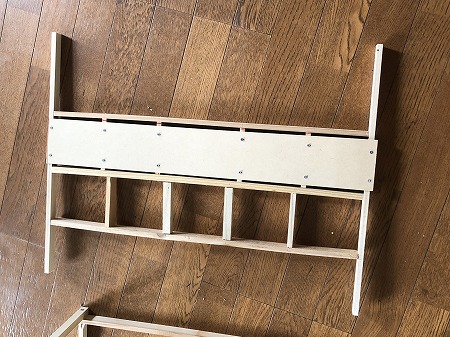
We will make the third stage.
How to make is the same method as the 2nd stage, but it made it while marking it and adjusting it so that the part of the ladder in front would be on the board of the 2nd stage.
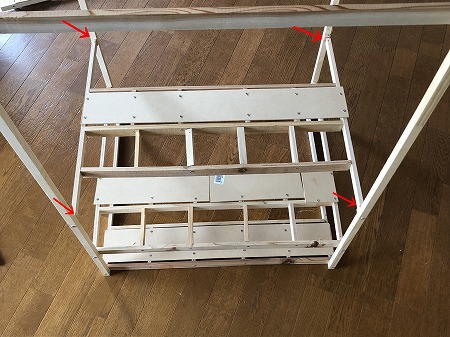
Attach the third step.
I noted that four 4 x 2 x 2 pieces of wood were prepared and inserted between the four columns (red arrow) It is what I installed from.
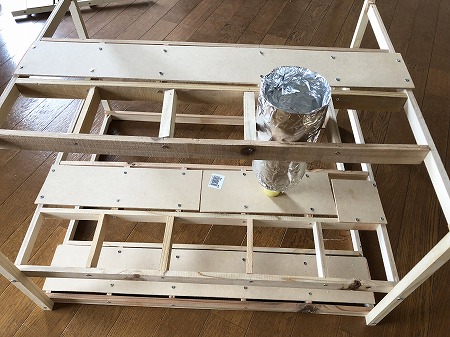
If you put a plastic bottle, it looks like this. (*^▽^*)
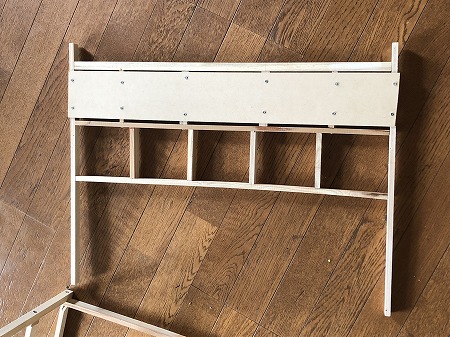
Create the fourth row.
How to make and attach is the same as the third stage.
(The part of the ladder is above the part of the third board.)
Attach the 4th stage.
(As with the third row, insert 4 x 2 x 2 wood into four columns (red arrows) and attach them.)
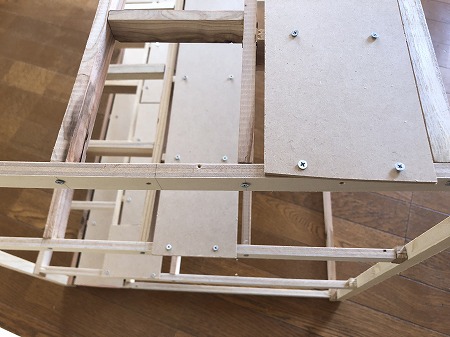

I photographed the part of the side.
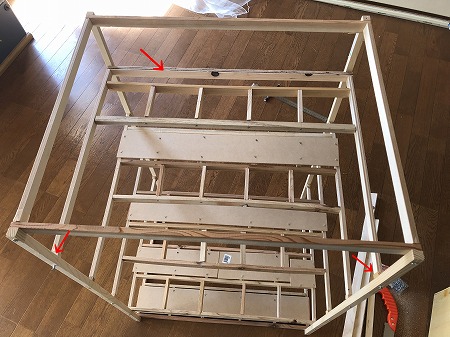

Make the last five steps.
The last part is just the ladder on the upper part of the 4th board, so attach the
part of the ladder to the top of the 4th board.
(When attaching the front two (the part of the red arrow is 4 × 2 × 2 of the wood inserted and attached)
attached the part of the back 60 × 4 × 2 .)
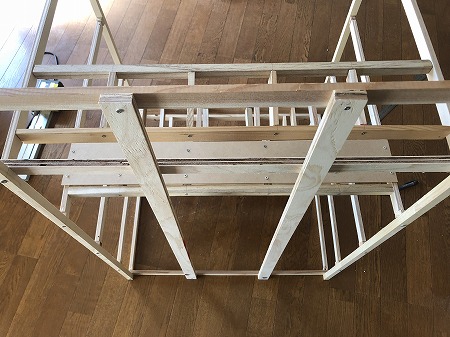

Finally put 100 × 4 × 2 wood in the back part and complete.(*^▽^*)
(If you hit the wood diagonally, I think it will be more stable.)
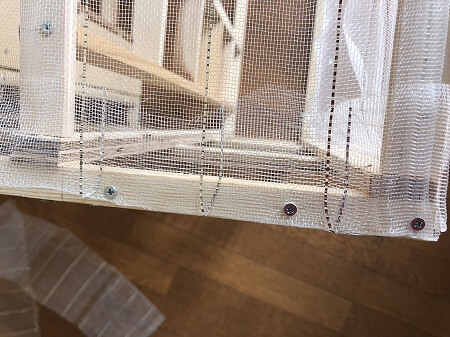

Finish the insect repellent sheet into 3 sizes of plastic bottle type hydroponics container box for finish
(2 horizontal frames, 1 vertically, 3 sheets in total)
It is completed by attaching it with wood screws.
(The front part (one vertical) attached so that the insect-proof sheet can be turned over)
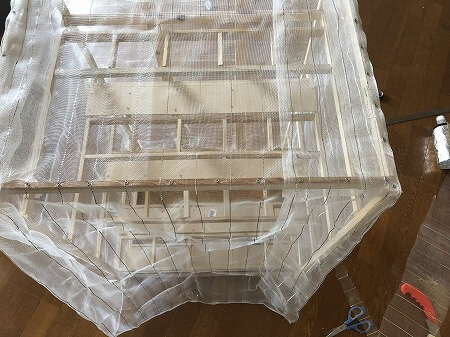

The front part was mounted so as to be flipped like this.
(When you hold it down, it is stopped with a clothespin.)
There is still a problem with durability and there is room for improvement, but ('ω') no
I hope that it will be helpful to those who are interested.
I explained how to make a plastic bottle hydroponic case simply by the animation.
(;^ω^)Sorry for the Japanese subtitles
(※Japanese is translated into English by translation software.
I am sorry if it is strange English.)
Related posts:
No related posts.
